
Building your own gaming PC is a rewarding experience that allows you to customize every aspect of your setup, from hardware performance to aesthetic design. Whether you’re aiming for high frame rates, stunning visuals, or smooth multitasking, assembling a PC tailored to your needs ensures you get the best value and performance.
This guide breaks down how to build a gaming PC into easy-to-follow steps, helping you select the right components, assemble them correctly, and optimize your system for gaming. By the end, you’ll have a powerful machine ready to handle anything from casual gaming to high-end eSports.
Plan Your Build
Before purchasing components, it’s essential to plan your gaming PC build based on your needs and budget.
Define Your Gaming Goals
- Casual Gaming: If you’re playing less demanding games like Minecraft or Among Us, a mid-range build will suffice.
- High-Performance Gaming: For AAA titles or VR gaming, prioritize powerful hardware like high-end GPUs and CPUs.
- Streaming or Content Creation: Consider additional RAM and storage to handle multitasking and video editing.
Set Your Budget
Decide how much you’re willing to spend. A solid gaming PC can cost anywhere from $800 to $3,000, depending on the level of performance you want.
Select Your Components
Make a list of the core components you’ll need for your build:
- Processor
- Graphics Card
- Motherboard
- Memory
- Storage
- Power Supply Unit
- PC Case
- Cooling System
- Peripherals


Choose the Right Components
Selecting the right components for your gaming PC is critical for ensuring optimal performance, compatibility, and longevity. Let’s break down each part and what to consider when choosing them:
Processor
The central processing unit (CPU) acts as the brain of your computer, handling game logic, physics, AI, and general computing tasks.
- Key Considerations:
- Core Count: Most modern games benefit from at least 4-6 cores, though newer titles and multitasking may require 8 or more.
- Clock Speed: A higher clock speed (measured in GHz) ensures faster processing of tasks.
- Compatibility: Check the CPU socket type (e.g., AM4 for AMD or LGA 1200 for Intel) to ensure it matches your motherboard.
- Popular Choices:
- Budget: AMD Ryzen 5 5600G, Intel Core i5-12400.
- High-End: AMD Ryzen 7 7800X3D, Intel Core i7-13700K.
Graphics Card
The graphics processing unit (GPU) handles rendering images, animations, and video for your gaming experience. It’s the most critical component for gaming performance.
- Key Considerations:
- VRAM: At least 8GB of VRAM is recommended for modern games at high settings.
- Resolution: For 1080p gaming, mid-tier GPUs suffice. For 1440p or 4K gaming, high-end GPUs are required.
- Ray Tracing and DLSS: Consider GPUs with advanced features for realistic lighting and performance boosts.
- Popular Choices:
- Budget: NVIDIA GTX 1660 Super, AMD Radeon RX 6600.
- High-End: NVIDIA RTX 4080, AMD Radeon RX 7900 XTX.
Motherboard
The motherboard connects all your components, acting as the backbone of your PC.
- Key Considerations:
- Chipset: Choose a chipset compatible with your CPU (e.g., AMD B550 for Ryzen or Intel Z690 for Alder Lake CPUs).
- Form Factor: Options like ATX, Micro-ATX, or Mini-ITX determine the size of the motherboard and the case compatibility.
- Features: Look for features like PCIe 4.0 support, Wi-Fi, and multiple USB ports.
- Popular Choices:
- Budget: MSI B550-A Pro (AMD), ASRock B660M Pro RS (Intel).
- High-End: ASUS ROG Strix X670E-F (AMD), Gigabyte Z790 Aorus Master (Intel).


Memory
Random access memory (RAM) temporarily stores data that your PC uses in the short term. More RAM ensures smoother multitasking and gaming performance.
- Key Considerations:
- Capacity: 16GB is the standard for gaming, while 32GB is ideal for enthusiasts or streamers.
- Speed: Measured in MHz (e.g., 3200MHz, 3600MHz), faster RAM improves performance.
- Type: Ensure your motherboard supports the type of RAM you choose, such as DDR4 or DDR5.
- Popular Choices:


Storage
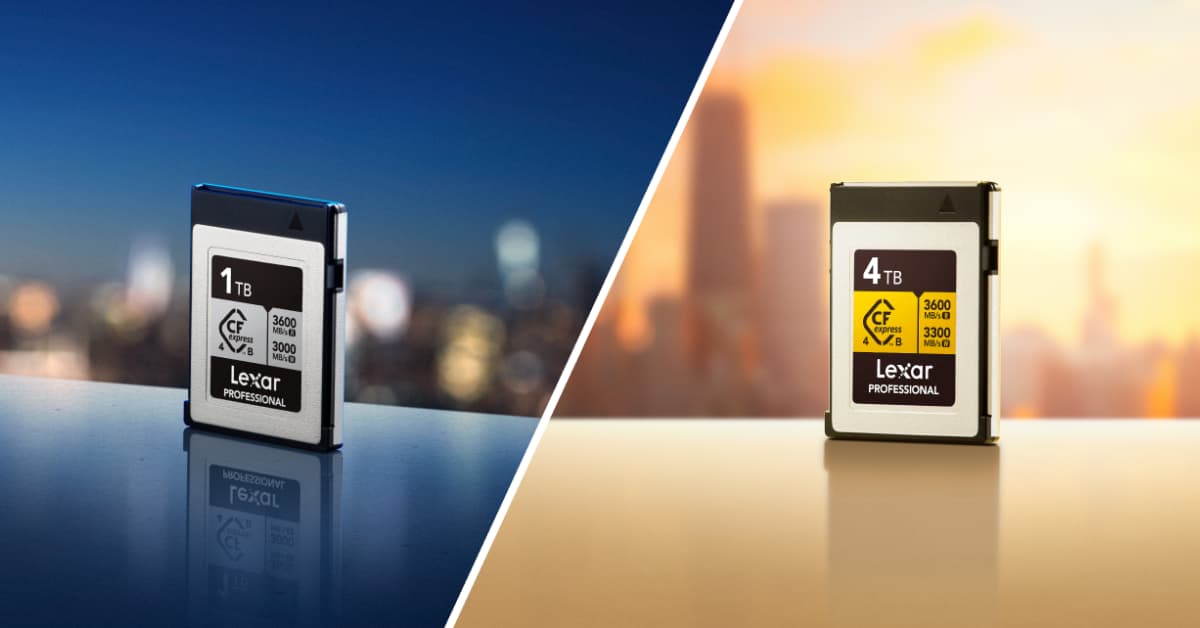
Storage is where all your games, files, and applications are saved. Modern gaming PCs rely on solid state drives (SSDs) for faster load times and overall system responsiveness.
- Key Considerations:
- Type: SSDsare faster than traditional hard disk drives (HDDs). NVMe SSDs provide the best performance.
- Capacity: A minimum of 1TB is recommended for gaming, as modern games require significant storage space.
- Secondary Storage: Consider an HDD for additional storage of non-gaming files.
- Popular Choices:
Power Supply Unit (PSU)
The PSU provides power to all your components. A reliable PSU is essential to ensure stable and safe performance.
- Key Considerations:
- Wattage: Calculate your power needs using online PSU calculators. Most gaming PCs require 600–850 watts.
- Efficiency Rating: Look for an 80+ certification (Bronze, Gold, or Platinum) for energy efficiency.
- Modularity: Modular PSUs allow you to use only the cables you need, improving cable management.
- Popular Choices:
- Budget: EVGA 600 W1 600W 80+ White.
- High-End: Corsair RM850x 80+ Gold.
PC Case
The case houses all your components and determines your build’s overall look and airflow.
- Key Considerations:
- Form Factor: Ensure the case supports your motherboard size (ATX, Micro-ATX, or Mini-ITX).
- Cooling Support: Look for cases with multiple fan mounts and space for liquid cooling radiators.
- Design: Features like tempered glass panels, RGB lighting, and cable management options add to aesthetics and functionality.
- Popular Choices:
- Budget: NZXT H510.
- High-End: Lian Li O11 Dynamic EVO.


Cooling System
Proper cooling ensures your components perform at their best without overheating.
- Key Considerations:
- Air Cooling: Cost-effective and reliable for most builds. Look for large heatsinks and efficient fans.
- Liquid Cooling: Provides better thermal performance and aesthetics, ideal for high-performance systems.
- Case Compatibility: Ensure your cooling solution fits inside your case.
- Popular Choices:
- Air Cooling: Cooler Master Hyper 212 Black Edition.
- Liquid Cooling: NZXT Kraken X63.
Peripherals
While not part of the PC itself, peripherals complete your gaming setup.
- Monitor: Choose based on resolution (1080p, 1440p, or 4K) and refresh rate (60Hz, 144Hz, or 240Hz).
- Keyboard: Mechanical keyboards offer tactile feedback and customization.
- Mouse: Gaming mice with adjustable DPI and ergonomic designs enhance accuracy.
- Headset: Look for headsets with surround sound or spatial audio for immersive gameplay.


Assemble Your Gaming PC
Once you’ve gathered all your components, it’s time to assemble your gaming PC. This step-by-step guide will ensure you put everything together correctly.
Step 1: Prepare Your Workspace
- Clean and Spacious: Use a flat, non-static surface with plenty of space to work.
- Tools Needed: A Phillips-head screwdriver, cable ties, and an anti-static wrist strap to prevent static discharge.
- Unbox Components Carefully: Lay out each component and its accessories for easy access.
Step 2: Install the CPU on the Motherboard
- Open the CPU socket latch on the motherboard.
- Align the CPU with the socket using the gold triangle as a guide.
- Gently place the CPU into the socket and secure the latch.
- If your CPU doesn’t come with pre-applied thermal paste, apply a pea-sized amount on its surface.
Step 3: Install the CPU Cooler
- Attach the cooler to the CPU using the mounting brackets provided.
- Connect the cooler’s fan cable to the CPU_FAN header on the motherboard.
- Ensure the cooler is firmly attached but not overtightened.
Step 4: Install RAM
- Locate the RAM slots on the motherboard.
- Open the latches on the slots you plan to use.
- Align the notch on the RAM stick with the slot and firmly press it in until the latches click.
Step 5: Install M.2 SSD (if applicable)
- Locate the M.2 slot on the motherboard.
- Insert the M.2 SSD at a slight angle, then gently press it down.
- Secure the SSD using the mounting screw provided.
Step 6: Install the Motherboard into the Case
- Place the case on its side and remove the side panels.
- Install the I/O shield that comes with the motherboard into the case.
- Align the motherboard with the standoffs in the case and secure it using screws.
Step 7: Install the GPU
- Remove the PCIe slot covers on the case where the GPU will be installed.
- Align the GPU with the PCIe x16 slot on the motherboard and firmly press it in.
- Secure the GPU to the case using screws.
Step 8: Install the PSU
- Position the PSU in its designated area, typically at the bottom or top rear of the case.
- Secure it with screws and connect the necessary cables (e.g., 24-pin motherboard cable, CPU power cable, PCIe power for the GPU).
Step 9: Connect Cables
- Use the motherboard manual to identify where each cable connects, including:
- 24-pin Motherboard Power
- 8-pin CPU Power
- SATA Power for Drives
- Front Panel Connectors (power button, reset switch, USB, and audio ports)
Step 10: Install Storage Drives (HDD/2.5” SSD)
- Mount 2.5” SSDs or HDDs in the drive bays of your case.
- Connect them using SATA data cables to the motherboard and SATA power cables from the PSU.
Step 11: Install Case Fans or Liquid Cooling (if applicable)
- Case Fans: Attach to designated fan mounts and connect them to fan headers on the motherboard.
- Liquid Cooling Radiators: Mount the radiator to the case and connect the pump and fans to the motherboard.
Step 12: Perform a Pre-Boot Check
- Connect the PC to a monitor, keyboard, and mouse.
- Turn on the power supply and boot the PC to ensure all components are functioning.
- Check that the CPU, GPU, and cooling systems are operational.


Install the Operating System and Drivers
With your PC assembled, the next step is to install the operating system and drivers for optimal performance.
Step 1: Install Windows (or Preferred OS)
- Create a bootable USB drive with the Windows installation media.
- Insert the USB into your PC and boot from it (use the BIOS to select the USB drive).
- Follow the installation prompts to complete the OS setup.
Step 2: Update Drivers
- Visit the manufacturer’s websites for your motherboard, GPU, and other components.
- Download and install the latest drivers for compatibility and performance.
- Use software like NVIDIA GeForce Experience or AMD Adrenalin to optimize GPU settings.
Step 3: Update the BIOS
- Check your motherboard manufacturer’s website for BIOS updates.
- Follow the instructions provided to update your BIOS, ensuring compatibility with your components.


Optimize Your PC for Gaming
After assembling and setting up your PC, optimizing it for gaming ensures you get the best experience.
- Install Games on an SSD: Faster load times and improved in-game performance.
- Adjust Graphics Settings: Use in-game settings or GPU software to balance visuals and frame rates.
- Enable Game Mode in Windows: Prioritize system resources for gaming tasks.
- Monitor Temperatures: Use tools like MSI Afterburner to keep track of CPU and GPU temperatures.
Troubleshooting and Final Adjustments
Common Issues
- No Power: Double-check all power connections and the PSU switch.
- No Display: Ensure the GPU and RAM are fully seated.
- High Temperatures: Check fan connections and airflow inside the case.
Fine-Tuning Performance
- Overclocking: Use BIOS or GPU software to safely increase performance.
- Cable Management: Organize cables for better airflow and aesthetics.
How to Build a Gaming PC: Final Words
Congratulations! By following this guide, you’ve built a powerful, customized gaming PC that’s ready to handle anything from casual gaming to intensive eSports. With the right hardware, assembly, and optimizations, you’ll enjoy smoother gameplay, faster load times, and stunning visuals.
Explore Lexar’s high-performance SSDs and storage solutions to take your gaming setup to the next level!